Design a Native Plant Landscape
JUMP TO A TOPIC: Get to Know Your Palette | Develop Your Vision | Sketch Your Design
GET STARTED GUIDES: Get Started | Shrink Your Lawn | Remove Invasive Plants | Make a Home for Wildlife | Design a Native Landscape
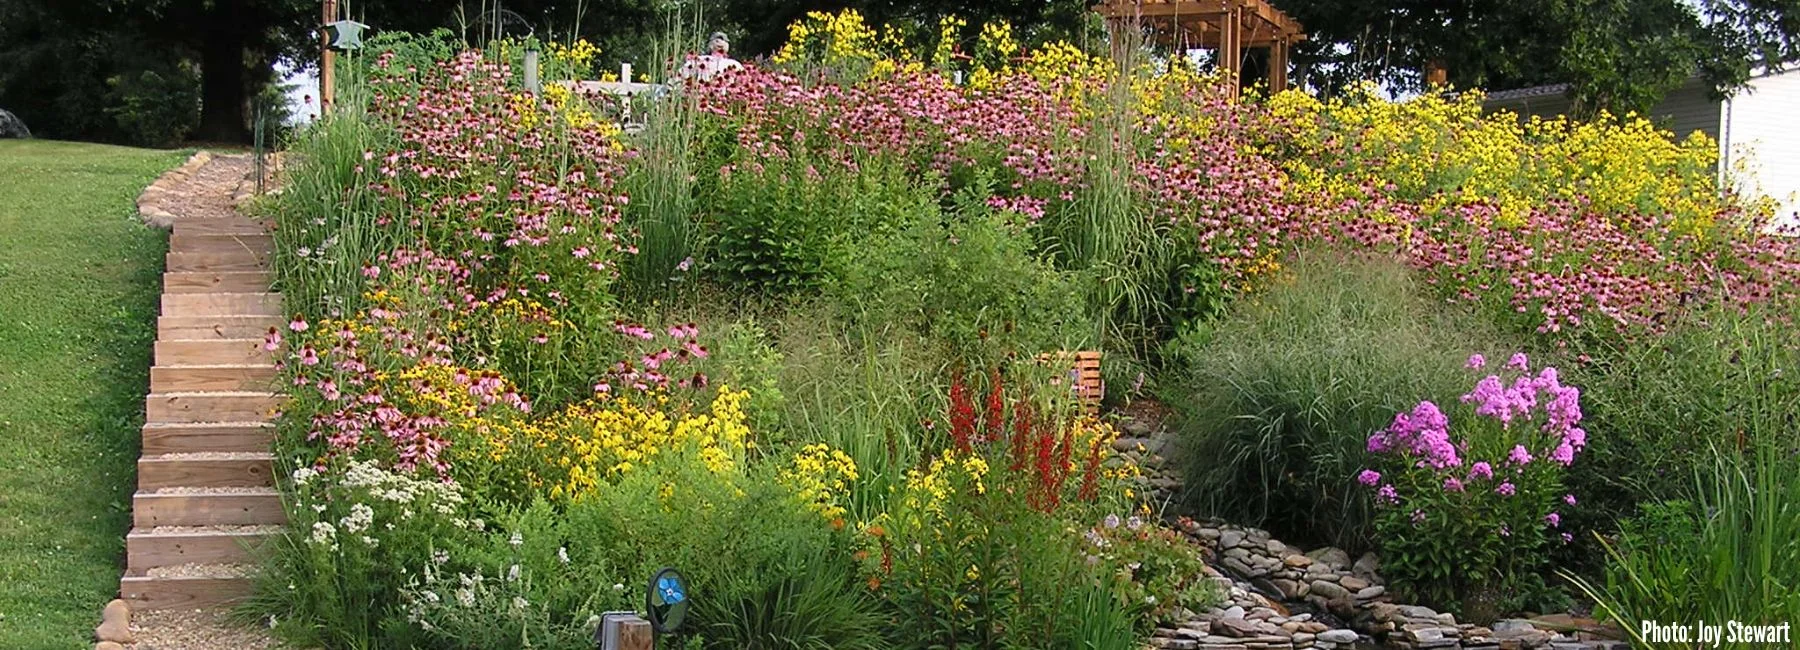
Now, it’s time to design your garden beds in preparation for acquiring plants and planting them. In this article, we cover the basic landscape design principles that maximize ecological services and benefits to wildlife. We consider the landscape layers that make up a rich wildlife habitat.
Start thinking about how you would like your wildlife habitat to look. Does your neighborhood require a formal landscape design or is a more natural look acceptable? Do you have specific goals for your landscape, such as attracting birds, pollinators, or aquatic wildlife? We will explain a step-by-step approach for designing wildlife habitat landscape beds. We will also provide resources for finding native garden designs already created for your ecoregion.
Get to Know Your Palette of Plants
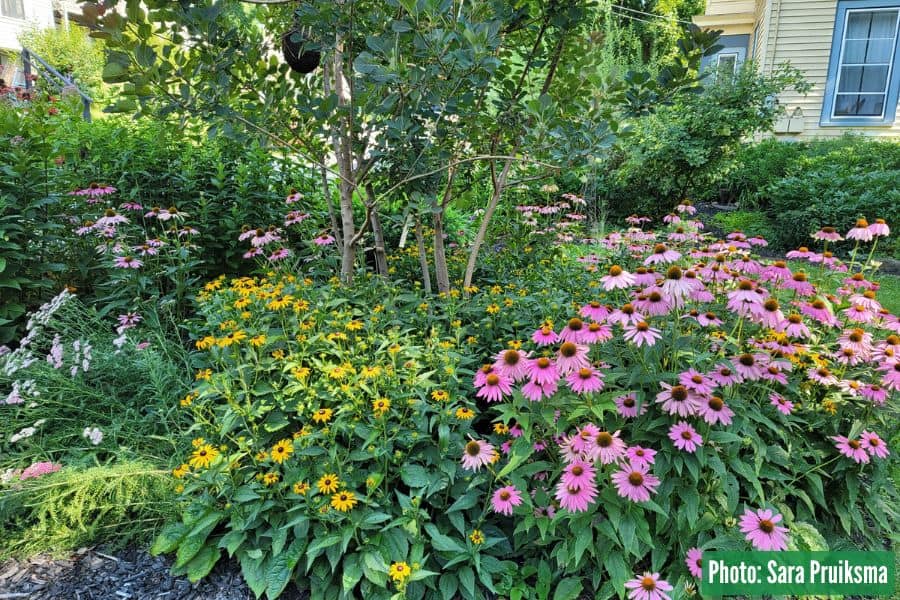
This planting demonstrates how drifts of a limited number of plant species can make a simple but lovely impression.
Get to know a small number of plants really well. This sage advice is a message that internationally acclaimed perennial garden designer Roy Diblik shares in his book The Know Maintenance Perennial Garden. Roy convincingly makes the case that by really knowing your plants, you can envision how they fit into a legible, attractive design. When you place plants in conditions where they are happy, they thrive. They fill in and block out weeds reducing the need for maintenance. This gives you time to putter about and enjoy the beauty of your garden.
Choose a Limited Palette of Plants
Limiting yourself to a small number of plants is a challenge since there are so many wondrous plants to choose from. Here are some basic guidelines for choosing plants for your wildlife habitat:
![]() Plant is native to your ecoregion.
Plant is native to your ecoregion.
![]() Plant is a keystone plant.
Plant is a keystone plant.
![]() Plant has a reputation for being easy to grow and propagate (or easy to procure in bulk).
Plant has a reputation for being easy to grow and propagate (or easy to procure in bulk).
![]() Plants are included from each of the five layers of the landscape (more on this later).
Plants are included from each of the five layers of the landscape (more on this later).
![]() Plants that will be placed together share similar requirements for light, water, and soil.
Plants that will be placed together share similar requirements for light, water, and soil.
Develop Your Vision
Beginning Your Wildlife Habitat
First, let’s consider the type of wildlife habitat you envision. The design may vary from formally designed to wild and natural. Different areas of your property may call for different approaches. You may already have a feeling for which design approach appeals to you given your resources, your experience level, and your property's location.
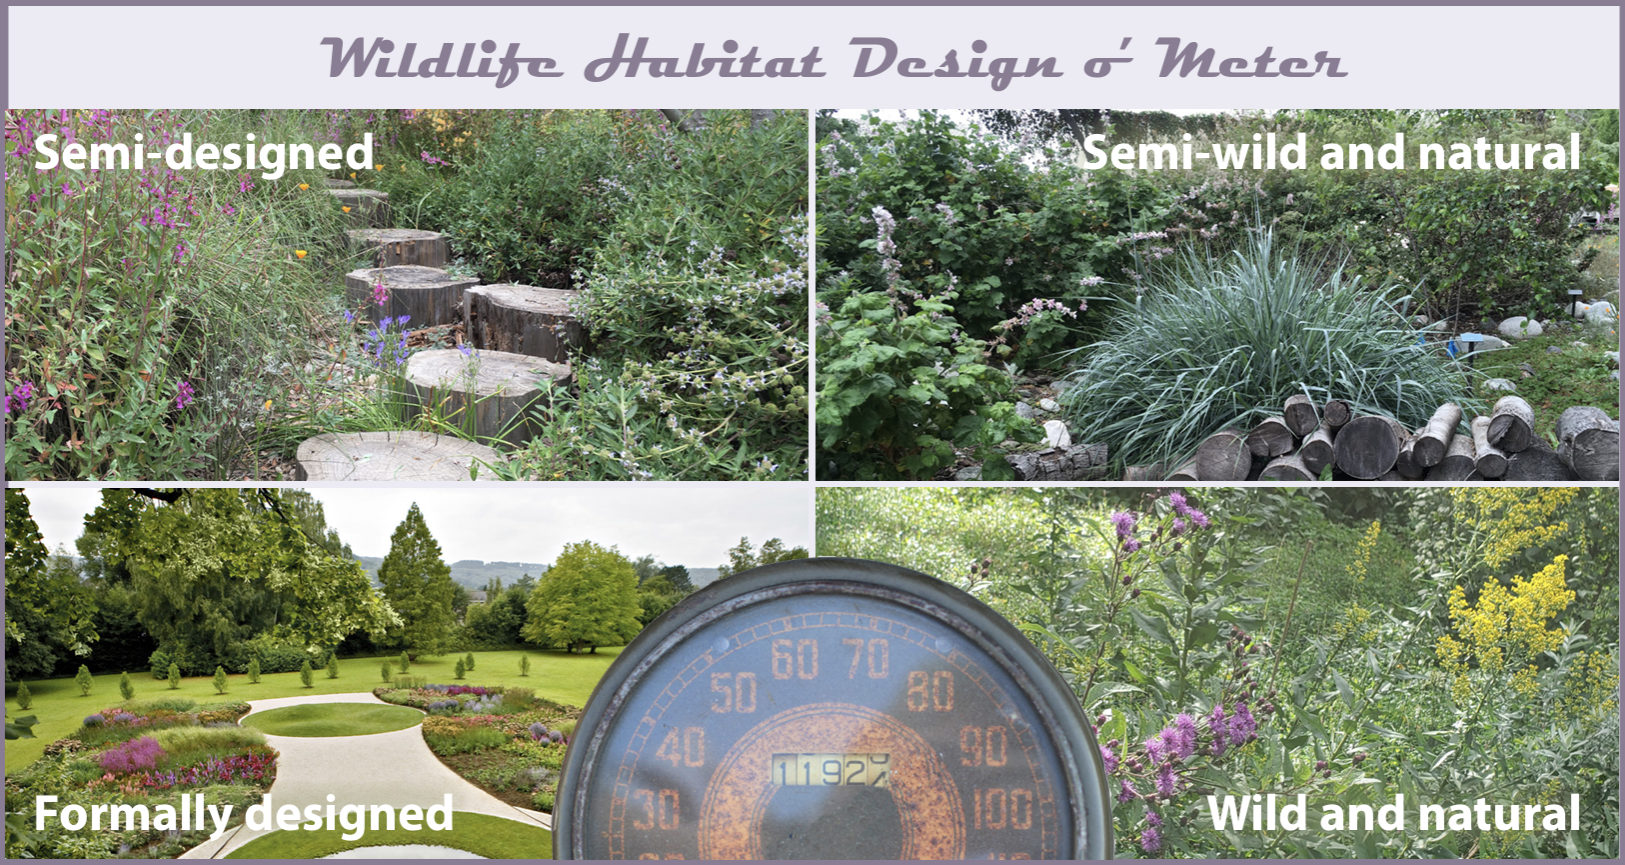
Which of these design approaches do you envision for your wildlife habitat?
![]() Formally designed with the use of eco-beneficial plants and management approaches to meet the needs of some wildlife while still meeting the requirements of a strict HOA
Formally designed with the use of eco-beneficial plants and management approaches to meet the needs of some wildlife while still meeting the requirements of a strict HOA
![]() Semi-designed and well-organized but still natural enough to support more wildlife while also fitting into a more traditional neighborhood
Semi-designed and well-organized but still natural enough to support more wildlife while also fitting into a more traditional neighborhood
![]() Semi-wild and natural appearance with some intentional design while providing a rich wildlife habitat with paths and other structures to gain neighborhood acceptance
Semi-wild and natural appearance with some intentional design while providing a rich wildlife habitat with paths and other structures to gain neighborhood acceptance
![]() Wild and natural appearance providing maximum wildlife support with no limits imposed by neighbors or a homeowners association (HOA)
Wild and natural appearance providing maximum wildlife support with no limits imposed by neighbors or a homeowners association (HOA)
Your property may be large enough that you can use a combination of these approaches in different areas of the landscape. Formal landscape designs require more advanced design skills, more extensive plant knowledge, and larger quantities of specific plants. Considering the design of a bed and choosing plants that are likely to look attractive together gives a bed a semi-designed and acceptable look for most front yards. Less visible areas of your property are suitable places to plant a landscape bed if you are just starting out because you can plant whatever plant materials you can procure even if their heights are mismatched or their colors clash. In an area hidden from view, you might experiment with plantings that focus exclusively on the ecological benefits of different plants without needing to consider the aesthetics of the bed.
Sketch Your Landscape
Design Your Bed in Seven Steps
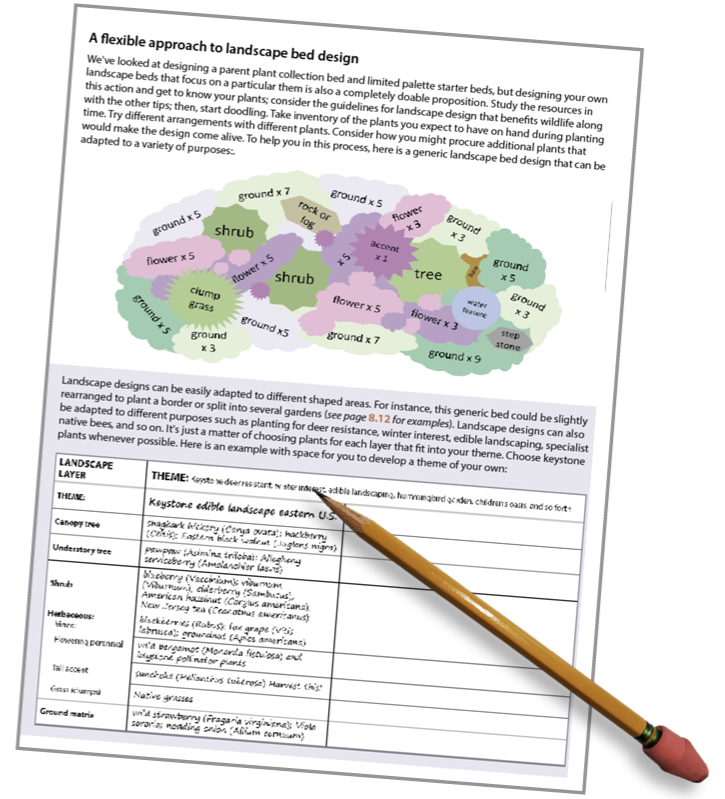
When you are ready to finalize your plans in preparation for planting, these seven steps will provide a step-by-step guide. This is where you'll bring all your ideas together and sketch a plan that focuses on the area you plan to start with. The plan will be easier to sketch on three layered sheets. Tracing paper and a pencil or upcycled clear sheets of plastic packaging and a permanent marker work well for drawing the top two layers.
PLAN SHEET A: (bottom) Immobile features of the property, utility lines, and growing conditions
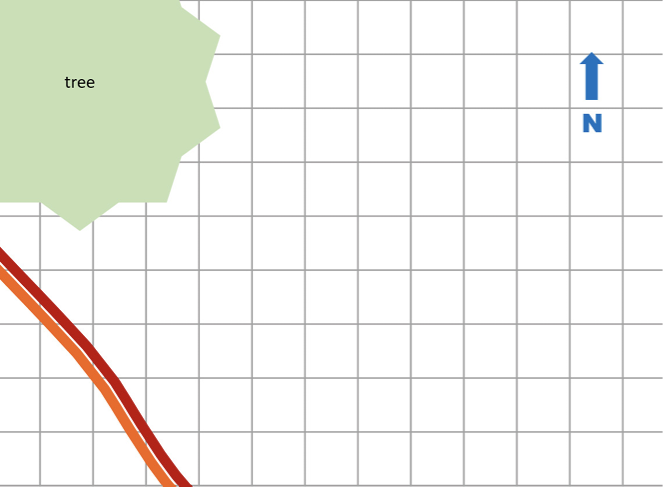
STEP 1: Mark the locations of significant features of the area making sure to mark where utility lines run through the area. Mark the locations of existing trees, water sources, and hardscape features, such as patios, pathways, and fences. Note any planned additions, such as water sources and hardscape features that will require plumbing or electrical work. In preparation for digging, call to have your property's utility lines marked. Call 811 before you dig (or visit call811.com). Determine how much area each block on your grid represents. Here, each block is equal to approximately one square foot.
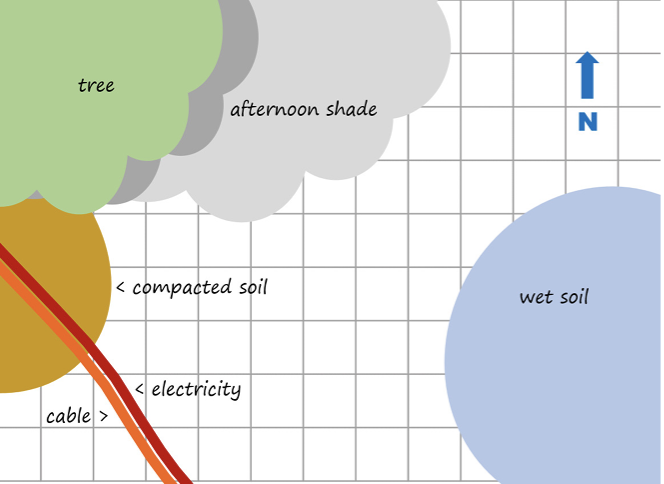
STEP 2: Observe and note the growing conditions of the area. You may already know the growing conditions for the area you plan to start with. If not, observe the area several times each day over time (ideally over a year if time permits). Record the sun and shade patterns. A shortcut for determining which plants are likely to thrive is to identify any existing plants (including weeds) that are growing well on the site. Then, look up the ideal growing conditions for these plants to get a good idea of the growing conditions on your site. Get to know the soil in different areas of your property: Is it sandy, loamy, or heavy clay? Make a note of the different soils and the sunny, shady, dry, and wet areas.
PLAN SHEET B: (middle) Shape and size of bed and placement of trees, shrubs, and herbaceous layer
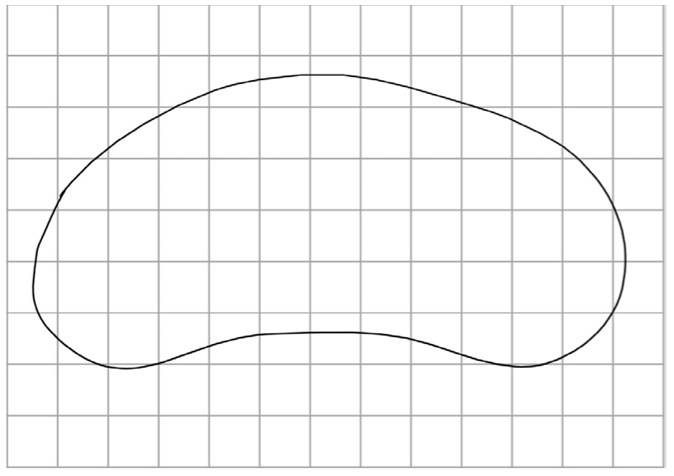
STEP 3: Define the shape and perimeter of the bed. A simple outline of the area you are starting with is sufficient. You may wish to draw a detailed plan, or it can be a rough plan that you later refine directly in your yard using a hose, rope, or sprinkled flour or sand for marking. These examples show that your plan need not be grandiose, simply clear enough to guide your efforts.
Keep in mind that you will be viewing Sheet B (above) with Sheet A underneath it (right).
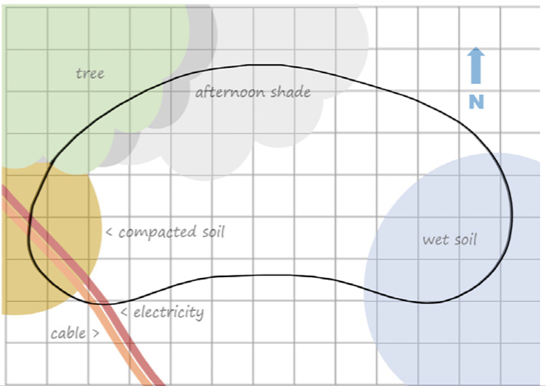
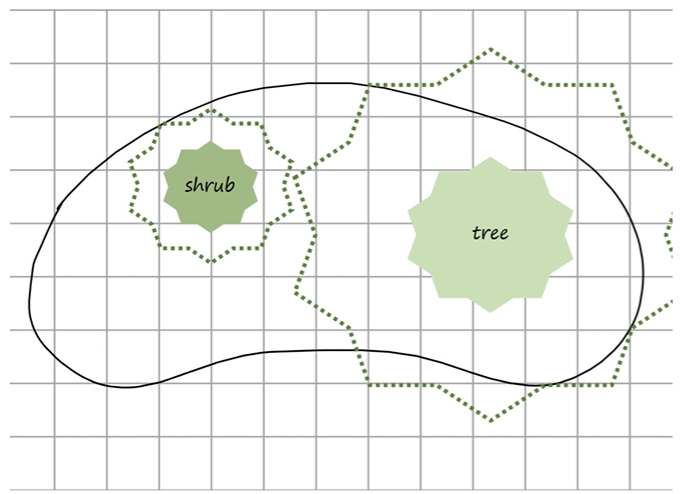
STEP 4: Mark the spots for keystone trees and shrubs. If you are including a tree, place it first; then, place shrubs. Consider the mature circumference of trees (and shrubs). Allow sufficient area for the landscape bed to expand to accommodate caterpillar pupation sites beneath a fully mature tree. For the next several years, the bed can be small since the tree will be small. The bed can be expanded to accommodate larger pupation sites as the tree expands its canopy and as you propagate or procure more plants to plant generously around the tree as it grows.
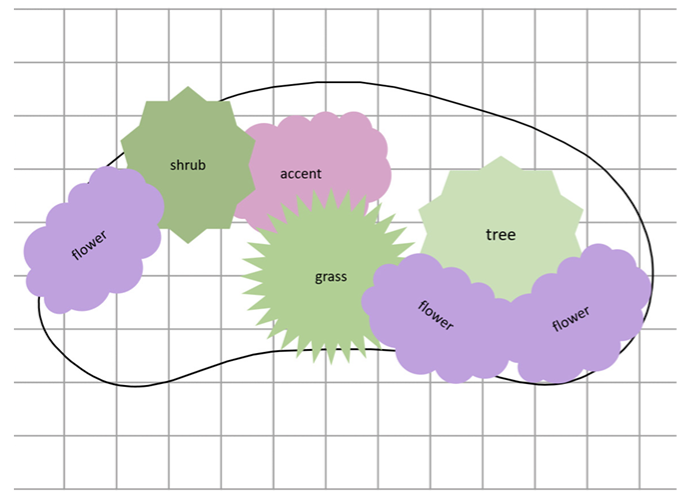
STEP 5: Mark the spots for keystone herbaceous plants, pollinator plants, and native grasses. Place multiples of the same species to make the plants more attractive to insects (and people). Intermingle plants where two species meet. When deciding which herbaceous plants to place around trees and shrubs, choose plants that meet the current site conditions. As trees and shrubs mature and the site conditions change, shade-adapted plants can be planted. Place plants as densely as resources permit. This will help control invasives, protect the soil, and provide a richer wildlife habitat.
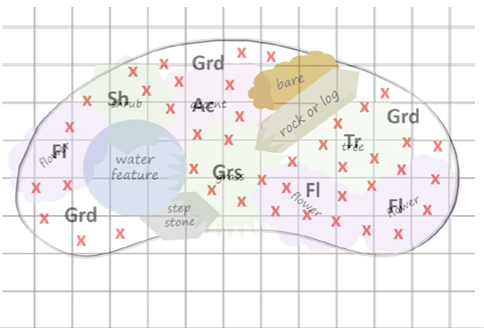
PLAN SHEET C: (top) Placement of logs, stones, water features, bare ground, and ground layer plants
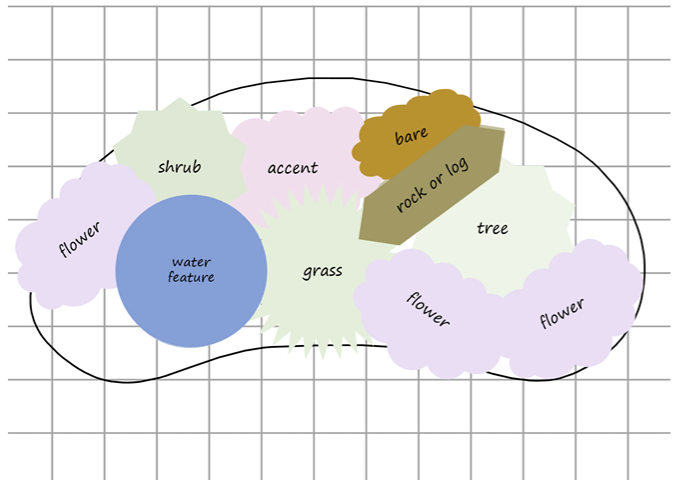
STEP 6: Mark the spots for several logs or large stones, additional water features, and bare ground for native bees. Logs and large stones will serve as pupation sites and hiding places for all kinds of small creatures. Determine the placement for additional water sources, such as elevated and ground-level birdbaths. Mark a spot which can be left bare for ground-nesting, native bees if this has not been adequately provided elsewhere on your property.
Sheet C shown with Sheet B underneath it (left)
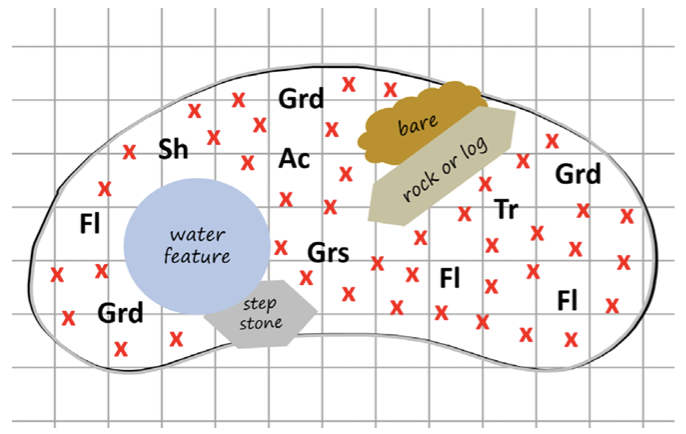
STEP 7: Mark the spots for low-growing ground layer plants. Fill in gaps with low-growing plants (red x's). Place sun adapted, low-growing plants in gaps or open areas. Under any existing large shrubs and trees, tuck in shade-tolerant plants, such as low-growing sedges (Carex spp.), mosses, and native creeping plants, to establish a matrix of ground layer plants. Your landscape bed design is ready to go!
Sheets A, B, and C stacked (right)
For example garden plans, visit Wild Ones.
For local native plant professionals and sellers, visit our Resource Directory.
This content is an excerpt from Nature's Action Guide by Sarah F. Jayne, shared here with the author’s permission. All rights reserved © 2025 Sarah F. Jayne.
Get the Full Action Guide!
GET STARTED GUIDES: Get Started | Shrink Your Lawn | Remove Invasive Plants | Make a Home for Wildlife | Design a Native Landscape

