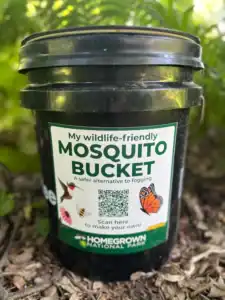
The Mosquito Bucket Challenge
A Safer Alternative to Fogging
A project by Homegrown National Park®

JUMP TO A TOPIC: How It Works | How to Make Yours | Why Not Fog | Sticker | Flyer | FAQs | Gallery
JUMP TO A TOPIC: How It Works | How to Make Yours | Why Not Fog | Sticker | Flyer | FAQs | Gallery
The Mosquito Bucket Challenge is a simple, effective alternative to fogging—protecting pollinators, pets, and people by safely targeting mosquito larvae without toxic sprays.
It’s safe, it's affordable, it's better for biodiversity. And it actually works.
Mosquitoes are part of our ecosystems. We’re not advocating for wiping them out completely. Instead, we’re focused on avoiding toxic fogging and safely reducing mosquito populations in the parts of our yards where we want to enjoy time outdoors.
Why Not Fog?

Mosquito fogging may seem like an easy fix, but it kills far more than mosquitoes. It harms birds, pollinators, pets, and kids, while barely reducing the mosquito population. Fogging only targets a small number of adults, leaving larvae untouched.
When you're planting native plants, supporting pollinators, and creating a yard that nurtures life, fogging undoes much of that work.
How It Works
Mosquitoes lay eggs in standing water. This bucket gives them a place to do that, then stops them. A natural soil bacterium called Bti (found in mosquito dunks) kills the larvae before they grow up and bite. This method, sometimes called a “bucket of doom” or “mosquito tea,” creates an irresistible breeding site and then shuts it down—without harming pollinators, pets, or people.
- Safe for pollinators
- Safe for pets and children
- Targets mosquito breeding where it starts
HNP cofounder, Doug Tallamy, explains how the mosquito bucket works.
Additional Best Practices for Mosquito Control
-
Dump standing water regularly—birdbaths, buckets, and anything that collects rain are prime mosquito breeding spots.
-
Plant native to attract birds, bats, and dragonflies, natural mosquito predators.
-
Use repellents for personal protection rather than fogging your whole yard.
These simple steps, paired with your mosquito buckets, make a bigger impact without damaging the life you’re working to support.


How-To with Lid/Wire Cover
How-To with "Rescue Stick"
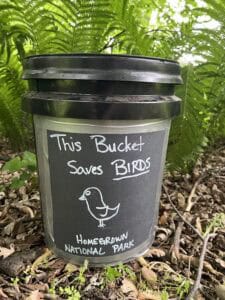
Step 1 - Decorate (Optional)
Decorate your bucket or use our ready-made sticker:
???? Download the free printable
???? Buy the weatherproof vinyl sticker on Zazzle
Both versions feature a QR code that links right back to these instructions, so you can help spread the word wherever your bucket goes.
Step 2 - Add Water
Fill the bucket about two-thirds full with water.
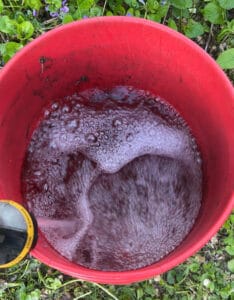
Step 3 - Make It Funky
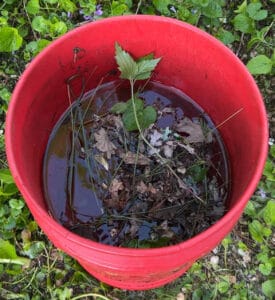
Add a small handful of dead leaves or grass clippings (you want to make the water stinky!).
Leave plenty of water surface area so mosquitoes have room to land and lay eggs.
Step 4 - Add Your Dunk
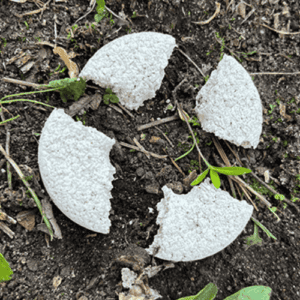
Break up your mosquito dunk and drop approximately one-quarter of the dunk into your bucket.
Step 5 - Add Cover Or Stick
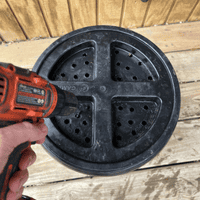


Add a lid with plenty of large holes drilled or wire secured with a rock or zip ties. Alternatively, (if you don't have pets or small kids), place a stick in the bucket so it leans out above the rim. This gives small animals an escape route if they fall in.
Step 6 - Place Your Bucket
Place the bucket in a quiet, shady area, away from your house, play areas, or gathering spots. If you have pets or small kids around, place your bucket up high to keep it safe and out of reach. Add additional buckets if you have a larger yard.
Corners of the yard or property lines often work well. Every yard is different—try a spot that stays damp and quiet.
Step 7 - Show It Off
Post your bucket on social media using the hashtag #MosquitoBucketChallenge! Find additional copy-and-paste text suggestions below.
Step 1 - Decorate (Optional)
Decorate your bucket or use our ready-made sticker:
Download the free printable
Buy the weatherproof vinyl sticker on Zazzle
Both versions feature a QR code that links right back to these instructions, so you can help spread the word wherever your bucket goes.
Step 2 - Add Water
Fill the bucket about two-thirds full with water.
Step 3 - Make It Funky
Add a small handful of dead leaves or grass clippings (you want to make the water stinky!).
Leave plenty of water surface area so mosquitoes have room to land and lay eggs.
Step 4 - Add Your Dunk
Break up your mosquito dunk and drop approximately one-quarter of the dunk into your bucket.
Step 5 - Add Cover Or "Rescue Stick"
Add a lid with plenty of large holes drilled or wire secured with a rock or zip ties. Alternatively, (if you don't have pets or small kids), place a stick in the bucket so it leans out above the rim. This gives small animals an escape route if they fall in.

Step 6 - Place Your Bucket
Place the bucket in a quiet, shady area, away from your house, play areas, or gathering spots. If you have pets or small kids around, place your bucket up high to keep it safe and out of reach. Add additional buckets if you have a larger yard.
Corners of the yard or property lines often work well. Every yard is different—try a spot that stays damp and quiet.
Step 7 - Show It Off
Post your bucket on social media using the hashtag #MosquitoBucketChallenge! Find additional copy-and-paste text suggestions below.
Additional Tips
- It's helpful to start early in your mosquito season, before mosquito populations explode.
- Speed up the "funkification" of your water by leaving your bucket in the sun for a few days.
- Drill a hole where you want the water line so that any excess water from rain doesn't cause your bucket to overflow.
Join the Challenge
Post a photo or video of your bucket using #MosquitoBucketChallenge. We’ll feature some of our favorite buckets on this page and across our social channels!
Tell us why you're choosing to use a mosquito bucket or use one of these ready-to-copy captions:
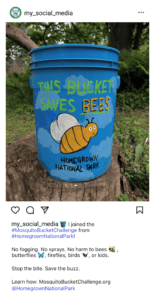
Social Caption 1
I joined the #MosquitoBucketChallenge from #HomegrownNationalPark!
No fogging. No sprays. No harm to bees, butterflies, fireflies, birds, or kids.
Learn how: visit link in bio @HomegrownNationalPark

Social Caption 2
Mosquito fogging kills everything except mosquitoes.
This bucket does it better, without harming pollinators or people.
Learn how: visit link in bio @HomegrownNationalPark
#MosquitoBucketChallenge #HomegrownNationalPark
Social Media Profile Graphic
You can also use our Mosquito Bucket Challenge image as your temporary Facebook or Instagram profile picture!

As Seen In Your Yard
Show us your bucket #MosquitoBucketChallenge
Made by our amazing community, these beautiful buckets help spread the word about safer, wildlife-friendly solutions.


Printable Flyer
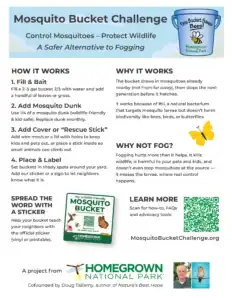
Hosting an event? Talking with curious neighbors? This one-page handout makes it easy to explain the “why” and “how” behind the Mosquito Bucket Challenge.
Clear, printable, and perfect for local outreach.
Download Here
Printable Flyer
Hosting an event? Talking with curious neighbors? This one-page handout makes it easy to explain the “why” and “how” behind the Mosquito Bucket Challenge.
Clear, printable, and perfect for local outreach.
Download Flyer
Let Us Help You Get Started Planting Native!
GET STARTED GUIDES: Get Started | Shrink Your Lawn | Remove Invasive Plants | Make a Home for Wildlife | Design a Native Landscape